How to check podcast loudness (LUFS and true peak) on a Mac
UpdatedShort answer
Measure the integrated loudness (LUFS) and the true peak, then compare them with the spec you're delivering to. Apple's podcast guidance is about −16 LKFS ±1 dB with a true peak no higher than −1 dBFS; EBU R 128 broadcast is −23 LUFS. macOS has no loudness meter of its own, but the free ffmpeg tool measures both in Terminal.
The free ways
Free: measure with ffmpeg in Terminal
ffmpeg is a free, open-source audio and video tool. It isn't built in to macOS; the usual way to install it is Homebrew (brew.sh). Its ebur128 filter measures loudness the EBU R 128 way, built on ITU-R BS.1770.
- Install Homebrew from brew.sh if you don't have it yet, then install ffmpeg with
brew install ffmpeg. - Go to the folder with your audio: type
cd(with a space), drag the folder onto the Terminal window and press Return. - Measure one file with the second line below (change episode.wav to your file's name). At the end ffmpeg prints a Summary: I is the integrated loudness in LUFS, LRA the loudness range, and Peak under True peak is the true peak.
- To check every WAV file in the folder, paste the last line (change *.wav to *.mp3 or *.m4a for other files). It prints each file name with its three readings.
- Compare the numbers with your spec. For Apple Podcasts: I between −17 and −15, and a true peak of −1 or lower.
brew install ffmpeg
ffmpeg -hide_banner -nostats -i episode.wav -af ebur128=peak=true -f null -
for f in *.wav; do echo "$f"; ffmpeg -hide_banner -nostats -i "$f" -af ebur128=peak=true -f null - 2>&1 | grep -E '^ +(I|LRA|Peak):'; done
ffmpeg's loudnorm filter can also change the loudness, but unless you give it the values measured in a first pass it uses dynamic processing, which changes how the audio sounds. A plain gain change needs the two-pass method.
Free: Audacity's Loudness Normalization
Audacity is a free, open-source audio editor (audacityteam.org).
- Open the file in Audacity and select all of it (Select › All).
- Choose Effect › Volume and Compression › Loudness Normalization, choose perceived loudness, type the target (for example −16 LUFS) and apply it.
- Export the result as a new file (File › Export Audio), so the original stays as it is.
This changes the audio rather than telling you whether it passes, so measure the new file, true peak included, before you deliver it.
Where the free ways stop
- macOS has no built-in loudness meter, so every free route means installing a tool and, for ffmpeg, using Terminal.
- ffmpeg prints numbers, not a verdict: you compare every file with the spec yourself, and 20 episodes make a long scroll.
- Targets differ. Apple Podcasts recommends about −16 LKFS, Spotify plays music at about −14 LUFS, EBU R 128 is −23 LUFS and US TV (ATSC A/85) −24 LKFS. Check the exact numbers in the spec you were given.
- Turning a quiet file up to the target can push its true peak over the ceiling. A gain change can't fix that; it needs a limiter.
- Nothing gives you a report to send with the delivery.
How LevelMark does it
LevelMark is a Mac app we make: check audio loudness against a delivery spec, file by file.
- Drop a file or a folder of audio on LevelMark and pick the delivery spec: EBU R 128, Apple Podcasts, Spotify, YouTube or ATSC A/85.
- Every file is measured (integrated loudness, loudness range, max short-term, sample peak and true peak) and marked Pass or Fail with the difference from the target. The free version checks 3 files at a time.
- Pro checks whole folders and writes a CSV and a PDF pass/fail report to send with the delivery.
- Pro also makes gain-only fixed copies at the target as new files, never over the true-peak ceiling. A file that would need a limiter is refused with the reason.
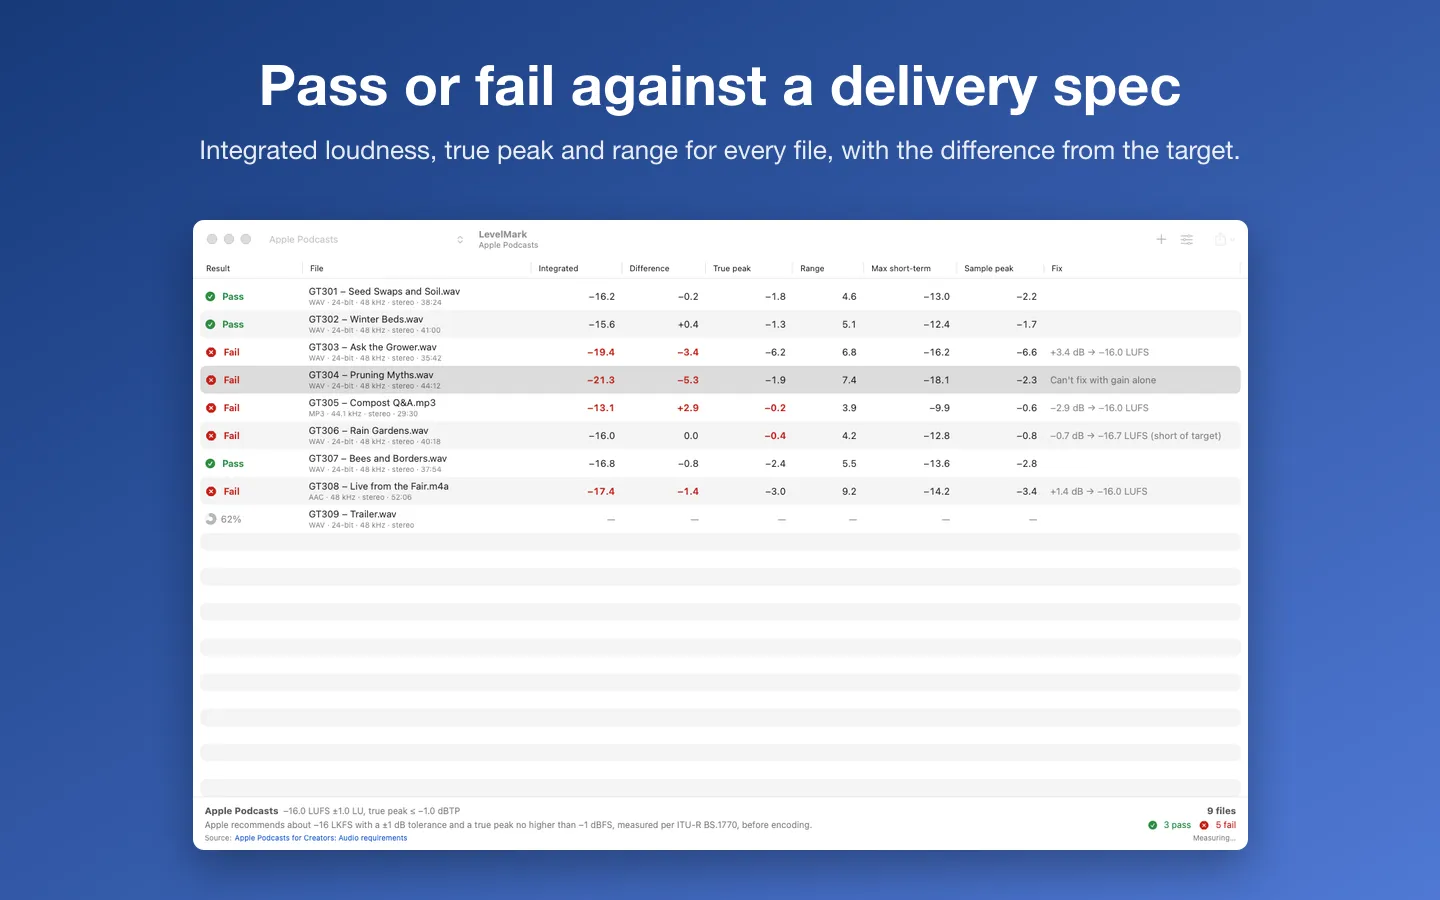
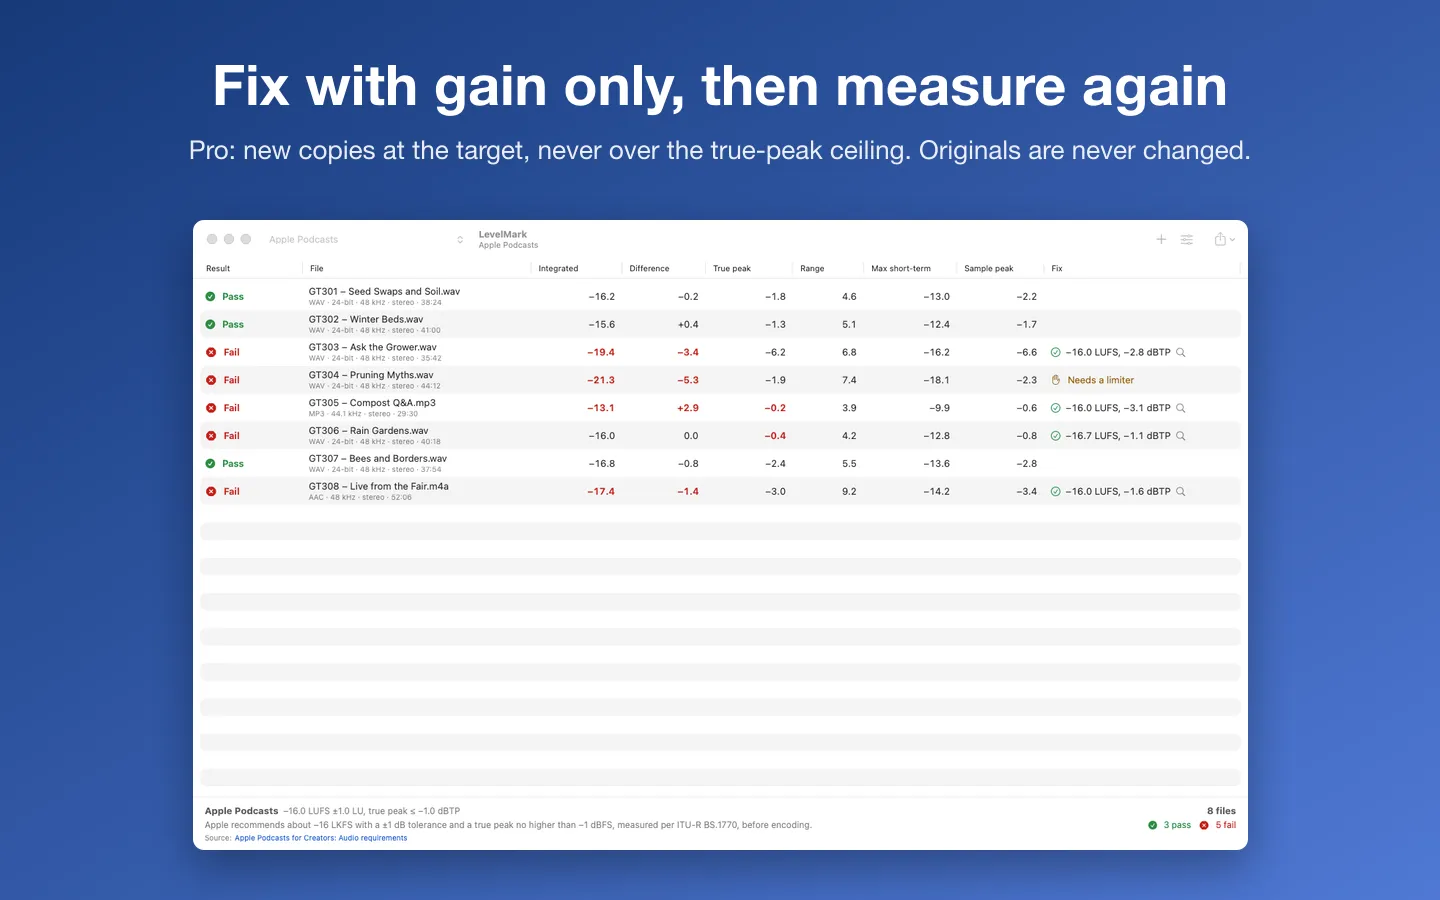
Free to use without a key: up to 3 files at a time against every preset, with the full table and pass/fail reasons.
$19.99 one-time for Pro, no subscription. Buy a license key to unlock Pro: whole folders and subfolders at once, CSV and PDF reports, and gain-only fixed copies that are measured again.
macOS 14 Sonoma or later. Apple silicon and Intel. Reads WAV, AIFF, MP3, AAC/M4A, FLAC and CAF.
Questions
What is LUFS?
Loudness Units relative to Full Scale: a loudness measurement defined by ITU-R BS.1770 that weights the audio roughly the way people hear it. LKFS is the same unit under another name. Integrated loudness is the average over the whole file.
What loudness should a podcast be?
Apple's podcast guidance recommends about −16 LKFS with a ±1 dB tolerance and a true peak no higher than −1 dBFS, measured before encoding. Networks and other platforms have their own numbers, so follow the spec you were given.
What's the difference between sample peak and true peak?
Sample peak is the highest sample value in the file. True peak estimates the highest level between the samples, which is what can clip when the file is converted or encoded to MP3 or AAC. Delivery specs set their ceiling on true peak.
Is LevelMark a certified loudness meter?
No. It's written to ITU-R BS.1770-4 and EBU Tech 3341/3342 and tested with the EBU's test signals, but it's a quality-control tool, not a certified meter. For a broadcast delivery, the broadcaster's own checks have the last word.